 SBX Tools
 Getting started
Initial Setup Prerequisites
SBX is designed to work exclusively with Microsoft 365 Groups and Shared Mailboxes.
The user performing the initial setup must have sufficient permissions to grant SBX access to the Microsoft 365 Groups or Shared Mailboxes. This requires the user to have Microsoft 365 Global Administrator permissions, or at least permissions to manage the specific Groups or Shared Mailboxes.
We strongly recommend using the portal's guided setup, as it is the easiest way to ensure a correct and smooth installation process.
Sign-in to portal
- Go to the portal.sbx.tools
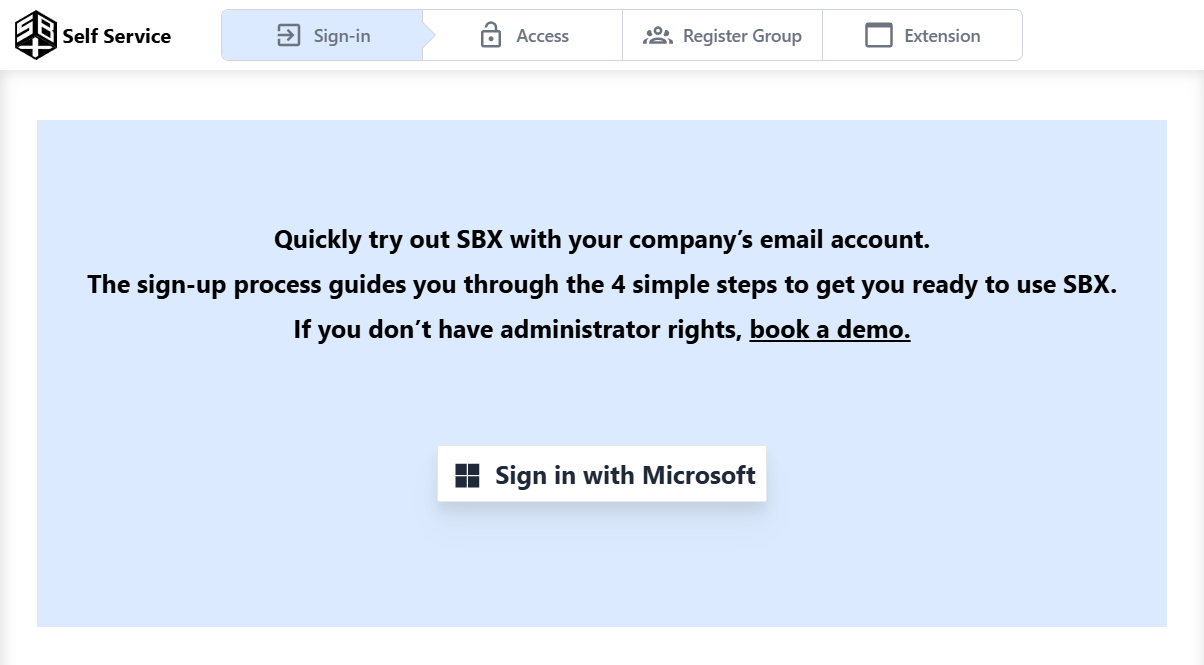
- Click on 'Sign in with Microsoft' to sign in using your company Microsoft account
- Enter your login details in the pop-up window and sign in.
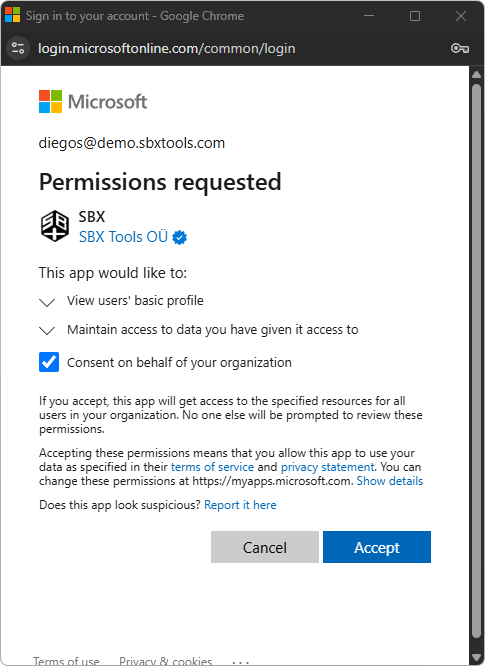
During your first login, you will be prompted to grant permissions to read your basic account information, such as your name and email address, which is needed to determine which user is using SBX. As an administrator, you can grant access on behalf of your entire organization. This eliminates the need for individual users to provide these permissions. To do this, check the 'Consent on behalf of your organization' checkbox.
Authorize SBX to Manage Emails
After logging into the portal, the next crucial step is to grant SBX the necessary permissions to manage your Microsoft 365 Groups or Shared Mailboxes. This ensures that SBX can manage emails according to your team's needs. For a detailed overview of what data we use and how, please read our Privacy Policy.
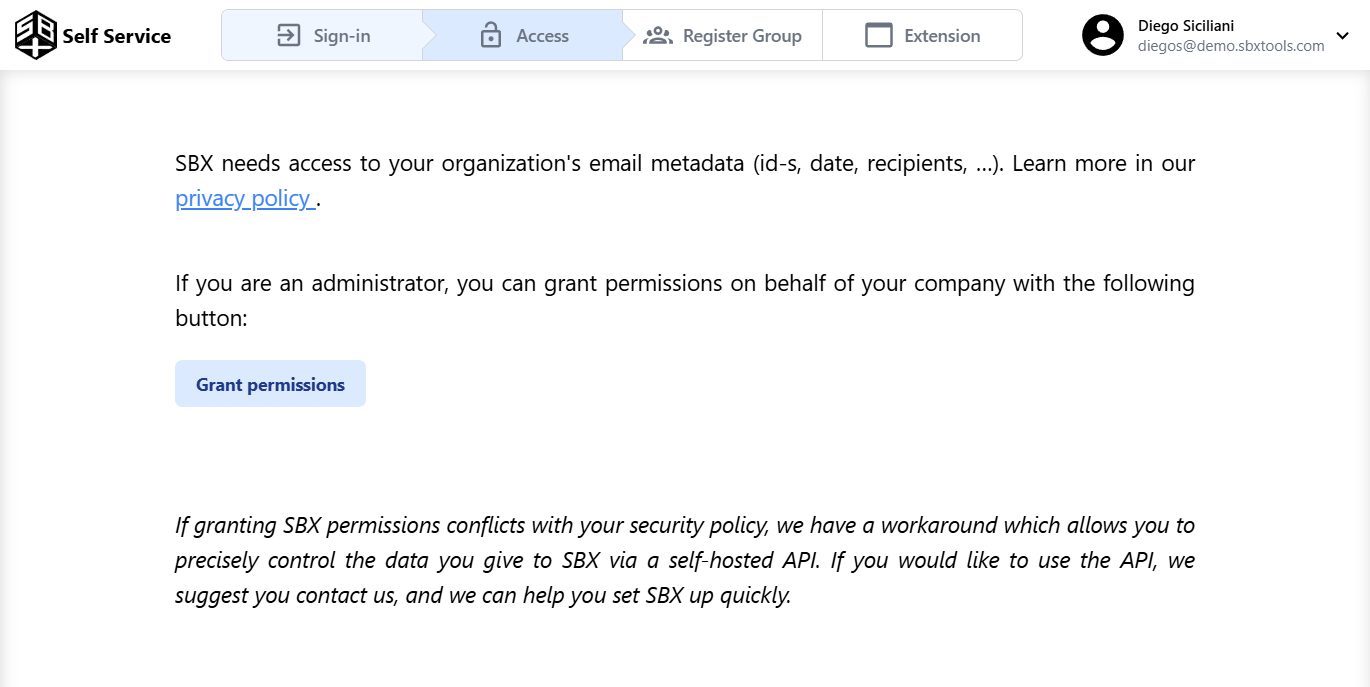
- To give access click 'Grant Permissions'
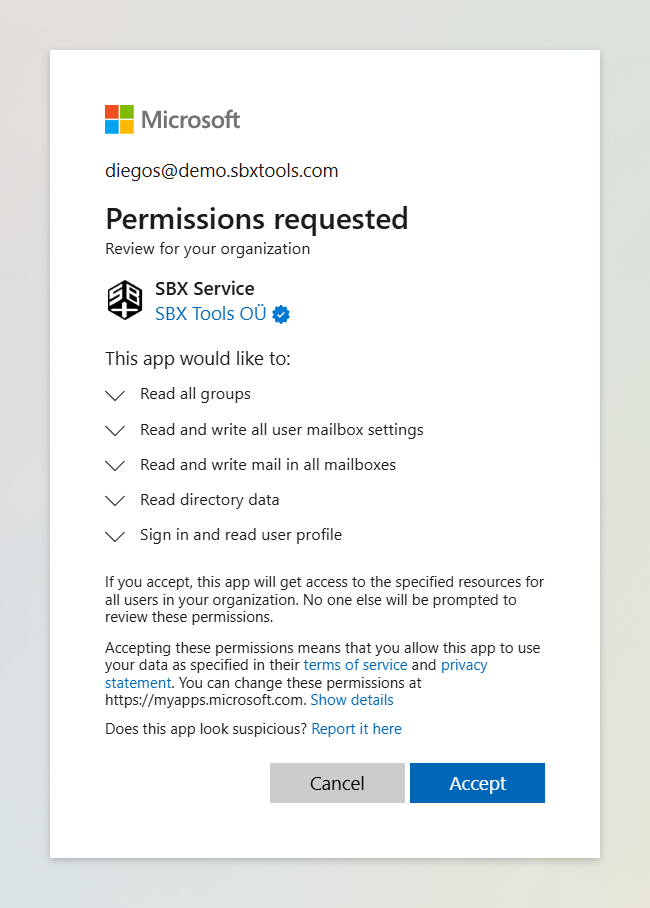
- In the page that appears, review the requested permissions and click 'Accept' to proceed
In case of security policy conflicts, we offer a self-hosted API for granular data control. To utilize the self-hosted API, please contact us for prompt setup assistance.
Connect Mailbox to SBX
After granting permissions, the next step is to add the Microsoft 365 Group or Shared Mailbox that you want to manage with SBX. This step connects your team's mailbox to SBX, allowing you to use all of SBX's features.
Begin by selecting the tab that corresponds to the type of mailbox you are adding: Microsoft 365 Group or Shared Mailbox.
Register Microsoft 365 Group
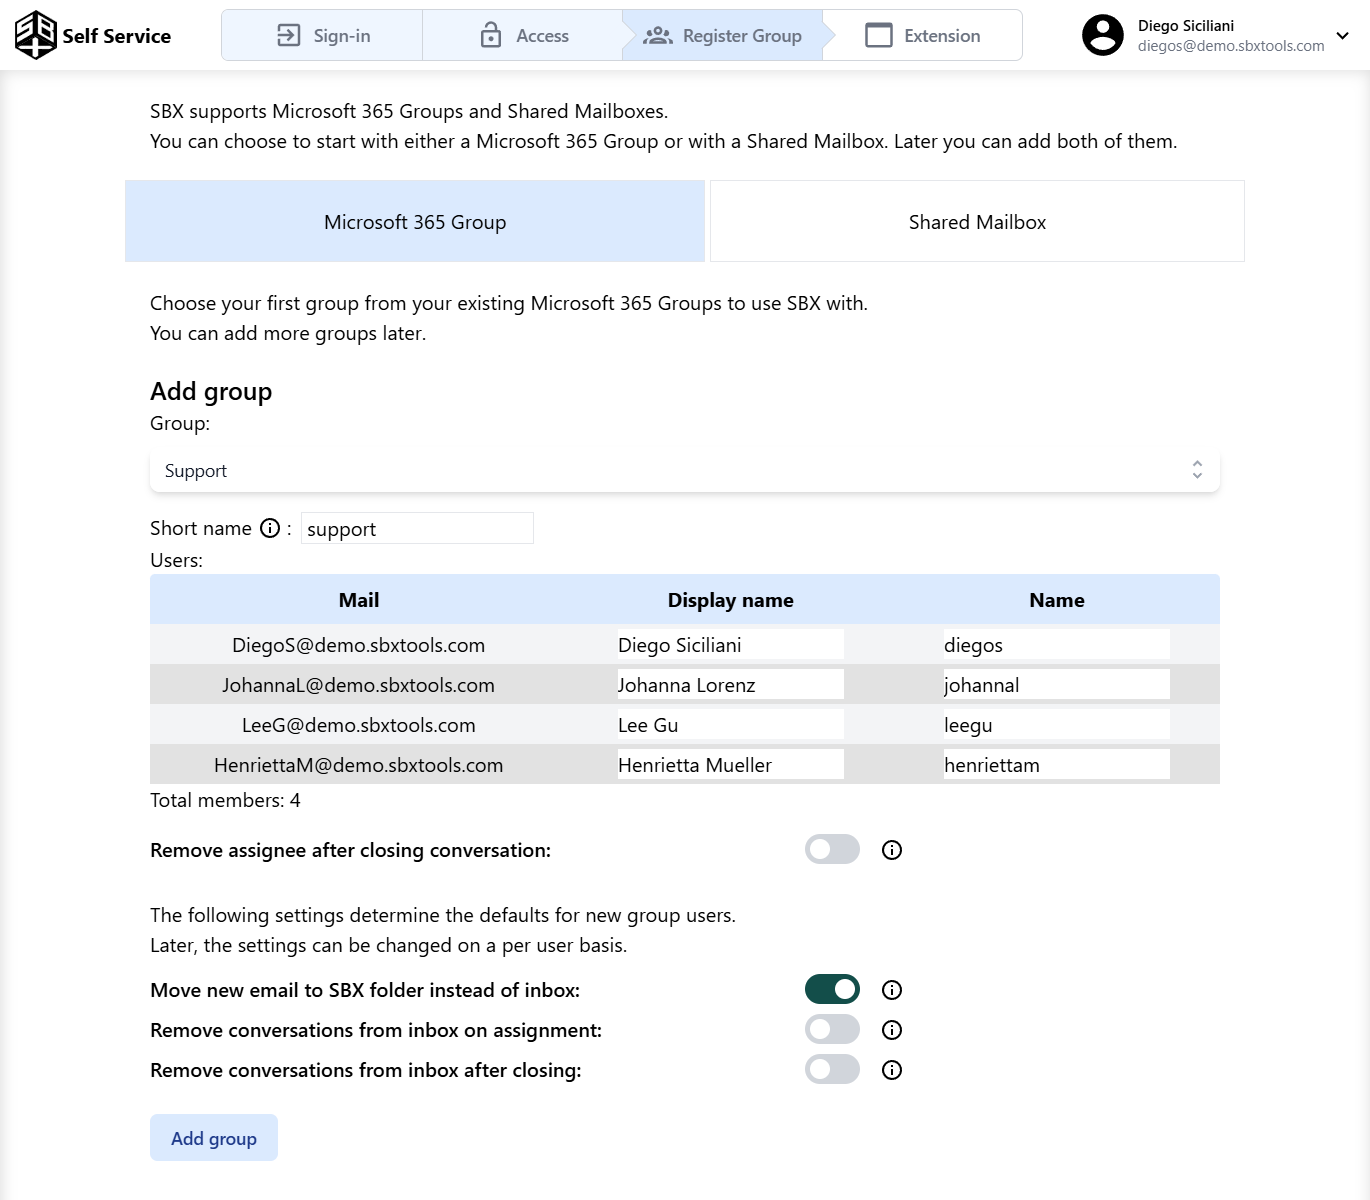
- Select the desired group from the 'Group' dropdown to connect it to SBX
- Rename the auto-generated short name if needed
- Important: The short name is used for naming Outlook Categories and cannot be changed later
- Review the listed users
- Customize user display name and short name as needed
- The display name is used for assignments and search folders
- Note: The short name is used for naming Outlook Categories and cannot be changed later
- Choose necessary settings for Microsoft 365 Group
- Remove assignee after closing conversation: Automatically unassign conversations upon closing. This option ensures the conversation is unassigned when reopened, like a new conversation. If this option is not selected, the previous assignee will be kept, which may not be desired if they are no longer responsible for the conversation.
- Move new email to SBX folder instead of inbox: Automatically move new emails to the SBX folder to filter irrelevant messages. Directly sent and assigned messages will always arrive in your inbox. With this setting, new messages are accessible in the SBX folder or the unassigned folder in Outlook with our extension. Note: This setting can be configured per user later.
- Remove conversations from inbox on assignment: Automatically move newly assigned messages to the SBX folder. Removing reassigned messages helps to keep your inbox tidy as you may no longer need emails that are assigned to someone else. Messages sent directly to you or assigned to you will always appear in your inbox. Assigned messages will still be displayed in the SBX folder and in the assigned user's folder in Outlook with our extension. Note: This setting can be configured per user later.
- Remove conversations from inbox after closing: Automatically move closed messages to the SBX folder. Closed messages will still be displayed in the SBX folder and in the assigned user's folder in Outlook with our extension. Note: This setting can be configured per user later.
Register Shared Mailbox
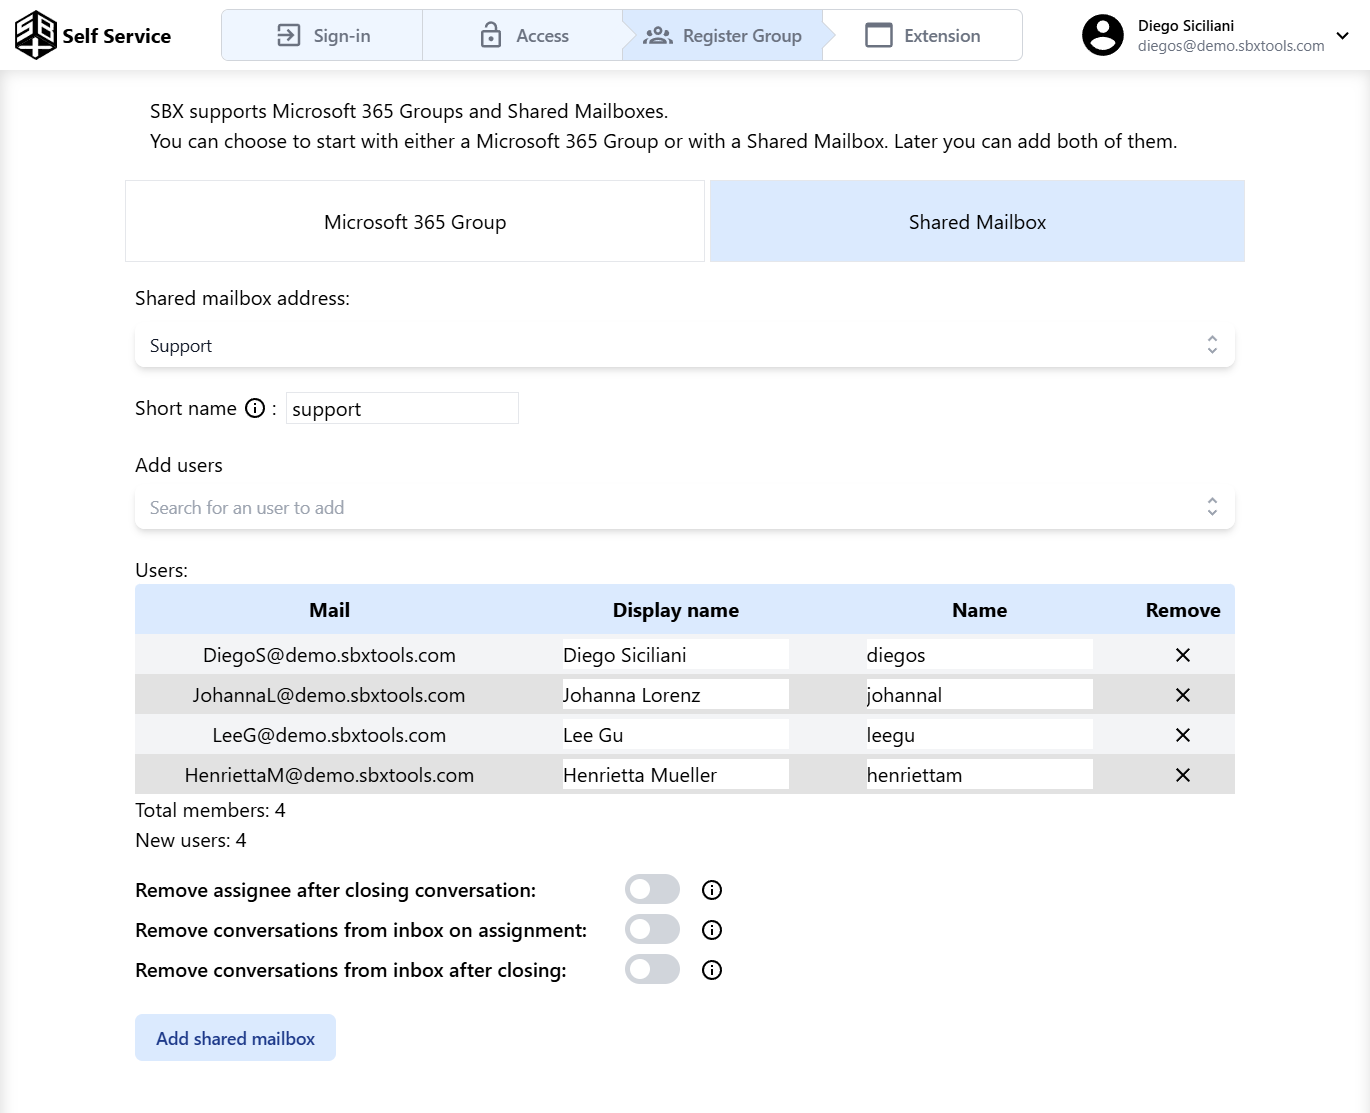
- Select the desired group from the 'Shared mailbox address' dropdown to connect it to SBX.
- Rename the auto-generated short name if needed.
- Important: The short name is used for naming Outlook Categories and cannot be changed later.
- Add users who will use SBX with this mailbox.
- Note: Access to SBX is independent of direct mailbox access.
- Review the listed users.
- Customize user display name and short name as needed.
- The display name is used for assignments and search folders.
- Note: The short name is used for naming Outlook Categories and cannot be changed later.
- Choose necessary settings for shared mailbox.
- Remove assignee after closing conversation: Automatically unassign conversations upon closing. This option ensures the conversation is unassigned when reopened, like a new conversation. If this option is not selected, the previous assignee will be kept, which may not be desired if they are no longer responsible for the conversation.
- Remove conversations from inbox on assignment: Automatically move newly assigned messages to the SBX folder. Removing reassigned messages helps to keep your inbox tidy as you may no longer need emails that are assigned to someone else. Messages sent directly to you or assigned to you will always appear in your inbox. Assigned messages will still be displayed in the SBX folder and in the assigned user's folder in Outlook with our extension. Note: This setting can be configured per user later.
- Remove conversations from inbox after closing: Automatically move closed messages to the SBX folder. Closed messages will still be displayed in the SBX folder and in the assigned user's folder in Outlook with our extension. Note: This setting can be configured per user later.
Add the SBX Extension to Your Outlook
Your company is almost ready to use SBX! Just add the extension to your users' Outlook to get started.
We currently offer three options for adding the SBX extension:
For the best experience, we recommend using SBX with Outlook web and adding the extension to your browser, available at the Chrome Web Store.
If you use the Outlook desktop client, we offer two options:
Due to certain limitations with the AppSource add-in (e.g., automatically fill email address fields), we recommend using the COM add-in. For a detailed comparison of these versions, read our article about AppSource vs COM Add-in.