COM Add-In Installation
Add-In Installation
Download for 64-bit Microsoft Outlook
Download for 32-bit Microsoft Outlook
Installing the add-in is straightforward. Start the installer. As no configuration is needed, the install wizard will simply ask you for permission to install and then finish.

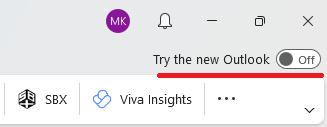
You will see SBX in your Outlook’s quick access toolbar the next time you open Outlook. You may need to restart Outlook. Note that you must use the old version of Outlook. So, make sure the following checkmark is unchecked.

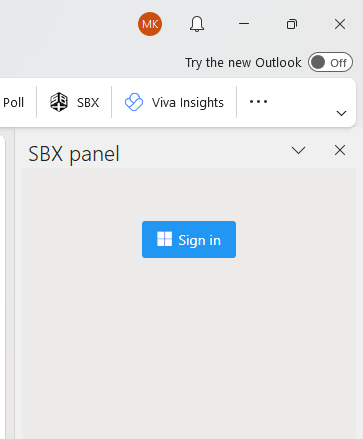
Click on SBX in the quick access toolbar. A panel will open on the right, and it will prompt you to sign in. Sign in with the Microsoft account you are going to use SBX with. You will need to grant permissions to SBX to view your profile ID and other essential data.

You are now ready to use SBX.
Configuration
To make SBX more comfortable to use in the desktop application, here are some suggested configuration options.
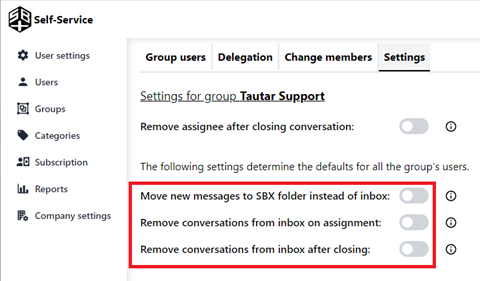
Disable Move new messages to SBX folder instead of inbox
Have your group administrators configure your groups to move new messages directly to members' inboxes LINK. This way you will see new emails in your inbox immediately. This can cause clutter in your inbox though, so it may be beneficial to enable the settings to “Remove conversations from inbox on assignment” and “Remove conversations from inbox after closing”, which remove emails from your inbox automatically once if they are no longer relevant to you. Alternatively, you can have someone monitor the unassigned virtual folder.

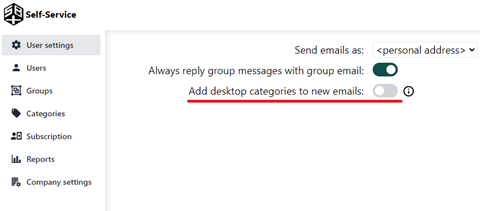
Add desktop categories to new emails
In the SBX portal open user settings and enable Add desktop categories to new emails. The setting creates colored categories that make it easier to quickly tell the status of an email in your inbox. Note that enabling this creates some new Outlook categories for SBX to use.

Pin or unpin the SBX panel
Choose whether the SBX panel should be pinned open or closed or open automatically when a group email is selected. To have SBX open automatically when it is needed make sure that the pin icon is crossed out.
